Postman
This page will explain how to use the Postman application, make requests to our API and generate code in the language of your choice so you can easily implement the code into your application.
![]()
- What is Postman?
- Create a Postman collection and download it.
- Import the downloaded file into Postman.
- Run the request.
- Generate code for the request.
What is Postman?
Postman is a free API client that makes API development and implementation faster, easier, and better.
Have a look at their site https://www.getpostman.com and download the native client for your platform to get started.
Create a Postman collection and download it.
We will take one of our most used API endpoint GetProfileDetails as a case for this tutorial.
Go the page of the GetProfileDetails endpoint and click the 'Run in Postman' button.
Note: You'll need to be logged in to be able to download a Postman collection that you can import and use.
You will see a pop-up appear that will allow you to set a couple of settings.
Fill in the desired values and Click 'Create' to get the collection that can be imported into Postman.
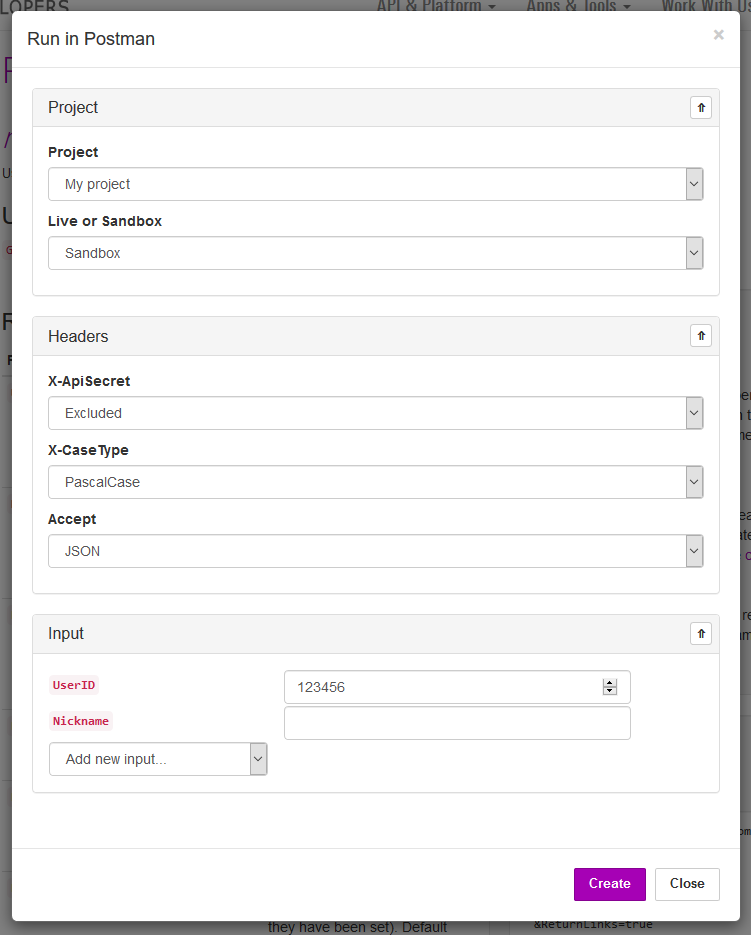
- Project
- Project: Choose your project that will make the API calls. The API keys of this project will be added to the collection.
- Live or Sandbox: Choose to call our Live or Sandbox API.
Note: You'll need an approved project to be able to call our Live API. - Headers
- Authorization: Some endpoints require an access token that can be obtained via the Unified Login. More information about access tokens can be found in the Access tokens page.
- X-ApiSecret: Choose if you would like to send the X-ApiSecret.
Note: Never send your secret in code that is exposed to the client. - X-CaseType: Choose your desired response case type. You can choose between
lowercase,UPPERCASE,PascalCaseandcamelCase.PascalCaseis the default. - Accept: Choose what you will accept as the return type. You can choose between
JSONandXML - Input
Note: The input types can be different in endpoints. The wizard will automatically generate the correct fields based on the endpoint. Fill in the values that you would like to use. You can add new input fields that are not in the list by default by selecting the input field in the select list.
Import the downloaded file into Postman.
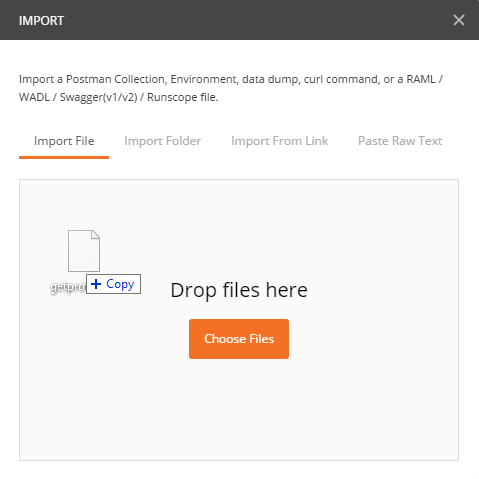
After you have clicked 'Create' you'll get the collection that's ready to be imported into Postman. You can do it by clicking File - Import, Clicking the Import button in the top or via the short-cut key CMD/CTRL+O. The Import pop-up appears in where you can drop the downloaded file. You could also click the 'Choose Files' button and select the downloaded file.
The collection will appear in your collections tab and is successfully imported:
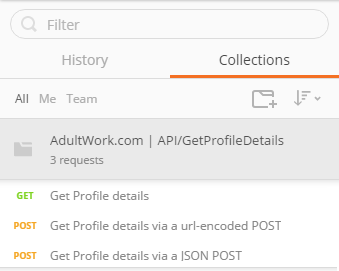
Run the request.
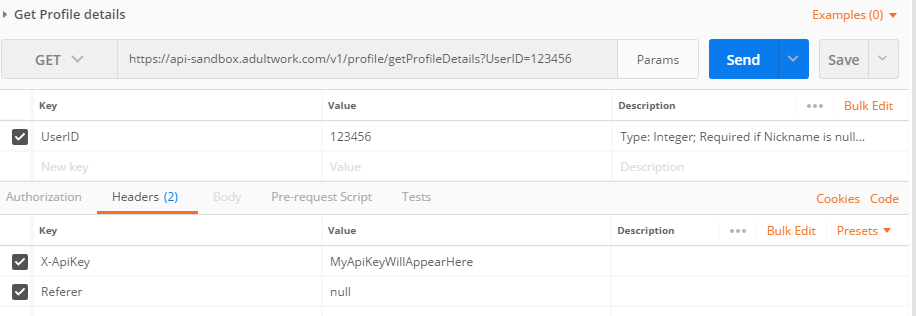
To run the request just click on one of the available requests in the collection. In our example we'll use the GET method for the GetProfileDetails endpoint.
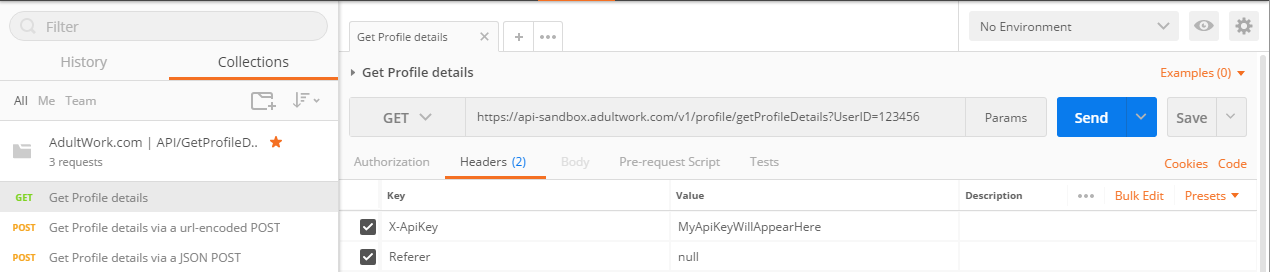
As you can see the URL will be of our sandbox API - as we have chosen that, the UserID of 123456 will be pre filled and the X-ApiKey will be filled with the correct value.
All you have to do now is click 'Send' and the request will be made. You will get the data as described in the documentation and that will be displayed in the Body tab in the result section.
When you click the 'Params' button next to the 'Send' button, you will see the parameters that are being send via the query string. You can add or modify the values there. This only goes for an endpoint with the HTTP Method GET. You can change the values of a POST method by clicking on the tab 'Body' and modify the values there.
Generate code for the request.
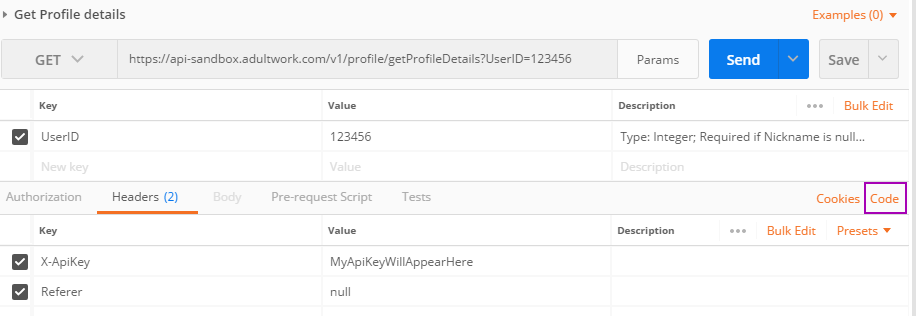
Postman lets you generate snippets of code in various languages and frameworks that will help you to implement the request into your own application. You’ll need to click the 'Code' link under the blue 'Send' button to open the Generate code snippets pop-up.
Use the dropdown menu to select a language - some languages have multiple options. This lets you select different frameworks from which to make your request.
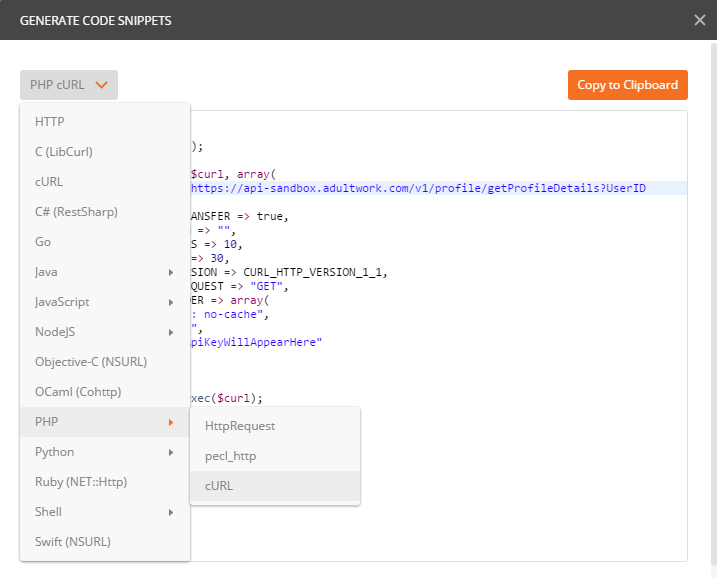
Click the 'Copy to Clipboard' button and you are able to paste this code into your application.
Note: It's a good practice to save the URL as an variable so when you are done testing your implementation you can switch the variables value to the live API and you are done.